
I’ve posted a cinnamon bun recipe before,
it was two summers ago and at that point I was a novice to yeast (still am a
novice to yeast).
I remember, as I was slicing through the longest piece of
cinnamon encrusted ‘rolly polly’ I had ever seen, being so bloody proud of
myself at having managed to transform dried balls of active yeast into a
pillowy soft sheet of raw dough, which was just moments away from being the best
thing I’d ever made.
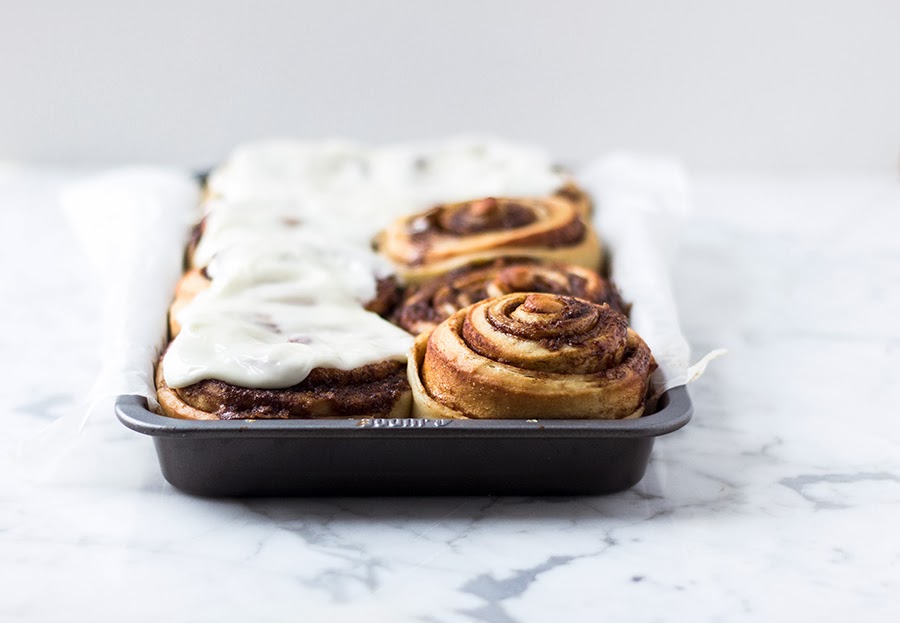
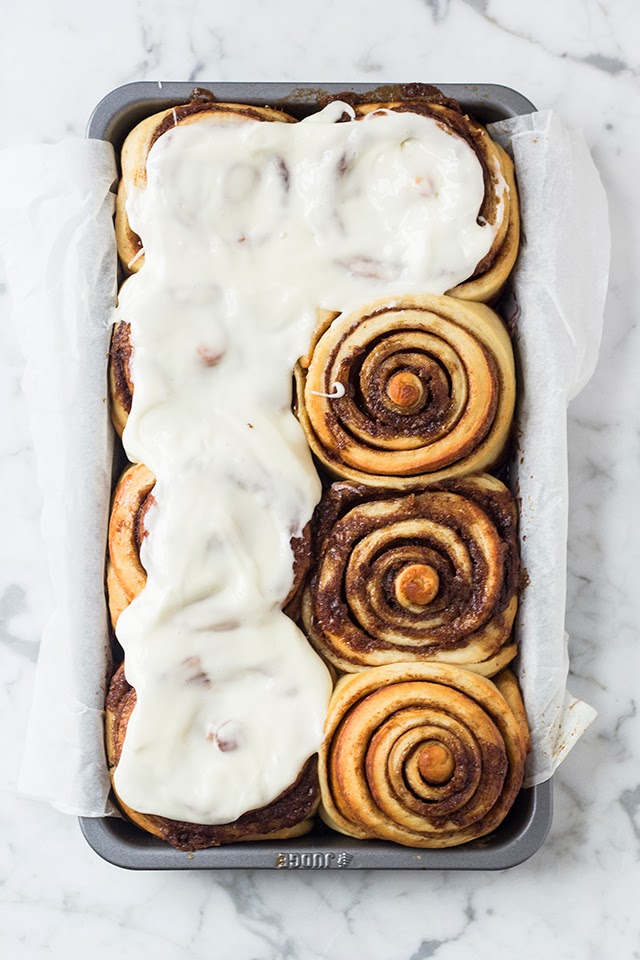
These buns are much, much richer than those bite sized
ones. These are the sort of buns you might sink your teeth into at a certain
chain bakery. Yes, these are definitely the kind of bun you would find at
Cinnabon. And yes, that is definitely a good thing. Happy Thanksgiving!
Overnight Cinnamon Buns
Makes 8 large buns
Ingredients
Ingredients
- 3/4 cup (150g) warm water
- 2 1/4 tsp (8g) active dry yeast
- 1/2 cup (90g + 1tbsp) caster sugar
- 1/2 tsp salt
- 1/4 cup (60g) buttermilk
- 1 egg
- 1/3 cup (65g) oil
- 4 1/2 cups (680g) plain flour
- 1/4 cup (50g) dark brown sugar
- 1 cup (250g) caster sugar
- 4 tbsp ground cinnamon
- 2 tbsp cornflour
- 80g unsalted butter melted
- 1 cup (150g) cream cheese
- 2 cups (350g) icing sugar
- 1 tsp lemon juice
- a splash of milk
Note: If you're in a hurry, you can skip the overnight chilling step. This just brings out a yeastier flavour in the bun which I kinda prefer. Instead, just proof the raw buns in a warm place for 2 hours and then bake.
Method
- In the bowl of a freestanding mixer fitted with the dough hook (or a large bowl) add water, yeast and 1tbsp of the sugar. Let stand for 10 minutes until the yeast starts to froth. In a jug mix together the buttermilk, egg and oil, then pour into the yeast along with the rest of the sugar and mix until combined. Stir through 2 and a 1/2 cups of the flour plus the salt, then gradually add the rest of the flour whilst mixing. Knead for 5 minutes, until the dough comes away from the bowl and does not stick to your fingers. Place in an oiled bowl, cover and let proof for 2 hours.
- In a small bowl mix together the filling ingredients except the butter and set aside.
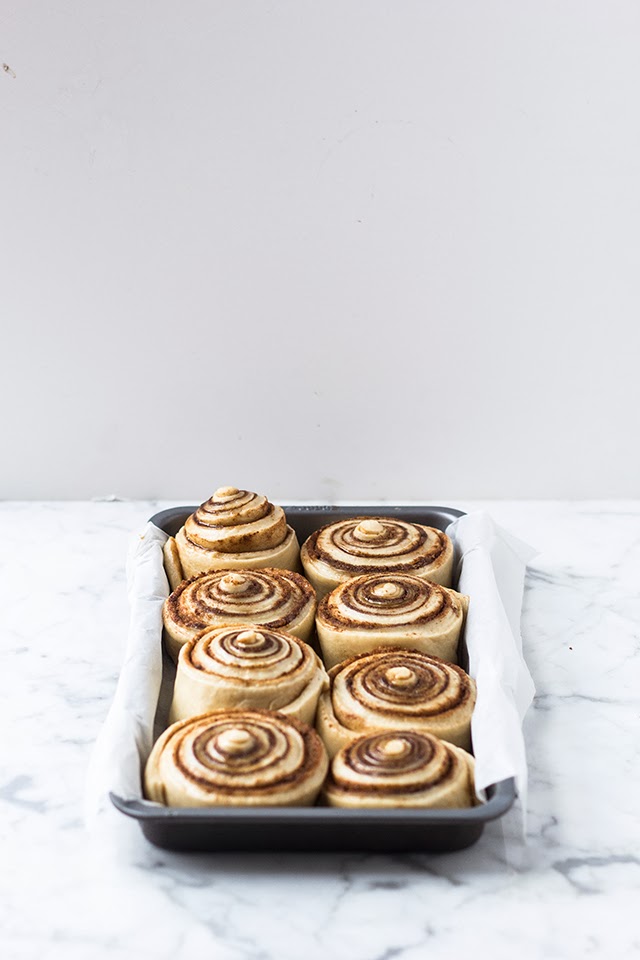
- Roll the dough out aprox 30cm by 40cm and brush with melted butter, making sure to leave 1 inch around the sides. Sprinkle filling mixture over the butter. Tightly roll the dough from the shorter side (to make thicker buns) and pinch the ends together to stop the filling from spilling out.
- Score dough every 1.5 inches and slice through. Place buns in a lined brownie ban, it doesn't matter if the buns are touching each other. Wrap pan in cling film and refrigerate overnight and/or up to 16 hours. Fill a jar with boiling water and place on the bottom shelf of the oven. Put the buns on the top shelf and let proof for half hour. Take the water and the buns out of the oven of the oven. Preheat the oven to 180°C/fan160°C/gas 4. and bake for 30 minutes, until golden brown.
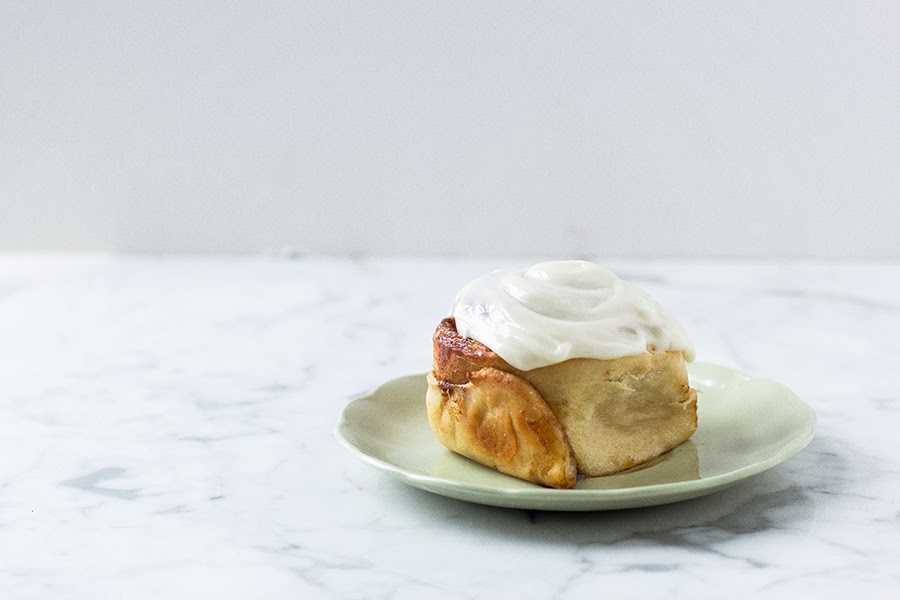
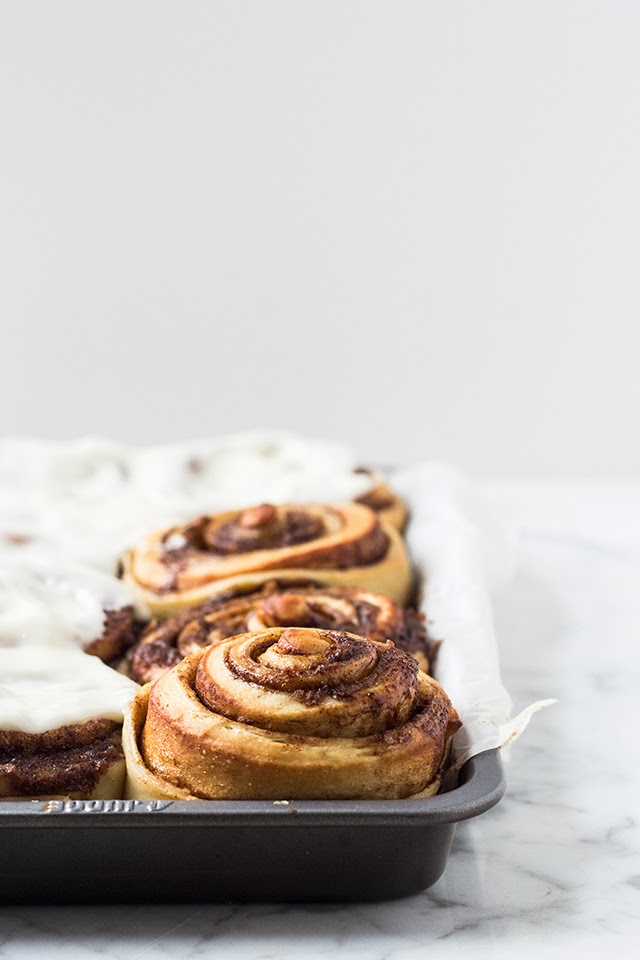
- Let buns cool and prepare topping. Whisk all of the ingredients together until smooth and runny. Pour over buns once slightly cooled. Best eaten the day they are baked, but lasts for 3 days!
Love Em x


Mmmm, they look delicious. I recently made my very first batch - it was ever so satisfying. Will definitely need to make lots more :)
ReplyDeleteThese look delicious! I was looking for a christmas morning breakfast recipe and I think this might be it. Thanks.
ReplyDeleteMy feelings on this...
ReplyDelete[...at a loss for words...]
ReplyDeleteWhen you come to the states, you wouldn't mind dropping a pan of these off at my house, right? Great. See you soon.
hahahahahahahahahahah i love you hanjan <3
ReplyDeleteI have just pinned this it looks so good!
ReplyDelete{ Teffys Perks Blog } X
Wow those are lovely!
ReplyDeleteHahaha love your commentary. Mmmmmm -- anytime someone compares something to Cinnabon I'm hooked. Love the look of these (so much luscious dark cinnamon!) Thanks for posting this!
ReplyDeleteHi-- These rolls look perfect! Quick question: do you leave the buns in the oven while it is preheating? I'm just a bit confused about the baking instructions and want to get it right.
ReplyDeleteThanks!
Oh these look good..
ReplyDeleteOh my gosh, they look amazing! I love cinnamon buns so much!
ReplyDeleteHi Shannon! So sorry for the confusion. I'v updated the recipe, thank you for letting me know that it confused you!
ReplyDeleteTake the buns and water out of the oven after they have proofed, preheat the oven and then return the buns to the oven for 30 mins. x
Hahaha.
ReplyDeleteGladly Nora,
It's a shame you wont be in New York when I am!
I say this as if America is geometrically the same size as England and this was just a convenient thing....
Mmmm delicious :-) x
ReplyDeletefff
ReplyDeleteLooks amazing! Do you think they'd be able to be made ahead and frozen? Thanks!
ReplyDeleteThank you Ashley! Yes, you should freeze them once you've cut/shaped the buns (after their second proof). So basically, the stage where you would refrigerate, just pop them in the freezer instead. They'll last for 1 month in the freezer. Make sure to take the buns out of the freezer the night before for thawing :)
DeleteMy pictures definitely didn't do these justice but yours definitely do! Seriously, gorgeous photography!
ReplyDeleteDont be silly, I'm sure your pictures are lovely! Where can I see the beauties? Thanks for making the recipe :)
DeleteLove the suggestion about freezing them. So, after they've been rolled, cut, refrigerated overnight and proofed a second time is when to put them in the freezer. I will definitely be making these again - they were wonderful this snowy weekend.
ReplyDeleteJust a mention, after reading, re-reading and re-reading again, there is no mention in the directions of where or when to add the salt in the ingredients list. I'm assuming it would be with the flour, but wasn't sure and managed to omit.
So sorry I forgot to add the salt to the instructions!! But you were right, I added the salt in with the first half of flour. You could also add it to the dough after the flour, and let it dissolve on top :) I'm making these again this week for my boyfriends coworkers! Far too excited!! As with any yeasted doughs, you should always freeze it after the second proof. Some people defrost before putting in the oven, others dont :)
DeleteTotally creeping through your blog. Apparently I've commented on these before but jeez, they really do look amazing. That dough, dude! Gorgeous.
ReplyDeleteThese look amazing!!
ReplyDeleteWhat is caster sugar? And is there a substitute for it?
ReplyDeleteCaster sugar is super fine granulated sugar! You could try adding granulated sugar to a food processor and whizzing until fine.
DeleteEmx
This is my go to recipe for Christmas cinnamon buns for three years in a row. They are the best-- and soooo much better than "tube" cinnamon buns. Will keep this a family tradition for years. Thank you so much for sharing!
ReplyDeleteLove this so much! Had to include it in my Fun Friday Finds post:
ReplyDeletehttp://www.thebeautydojo.com/fun-friday-finds2/